First, I have to admit that molding your own ACME nuts is something far better than buying them. All bought ones have an unsatisfactory amount of play, and when dealing with lasers, play and backlash is the bane of one's existence.
Not being one to take anyone's word for granted, I initially bought some Nylon-MoS2 (Mylon-Molybdenum disulphide) ACME nuts, and though the person I talked to un the phone said it was done on a lathe, with an ACME tap, the end result is...well, shitty..

They may look the part, but I measured up to 0.4 mm (15.8 thousandths for the imperial fanboys) slop in these bad boys. To say it's unacceptable is a serious understatement.
Also, bronze ACME nuts won't do any better....Unless you do you own tapping on a lathe and get them to exactly fit the screw. But since I don't have a lathe....resin casting it is.
I've tried several resins, from cheap and readily available ones to expensive cans of the stuff.
First off, I used this kind of resin:
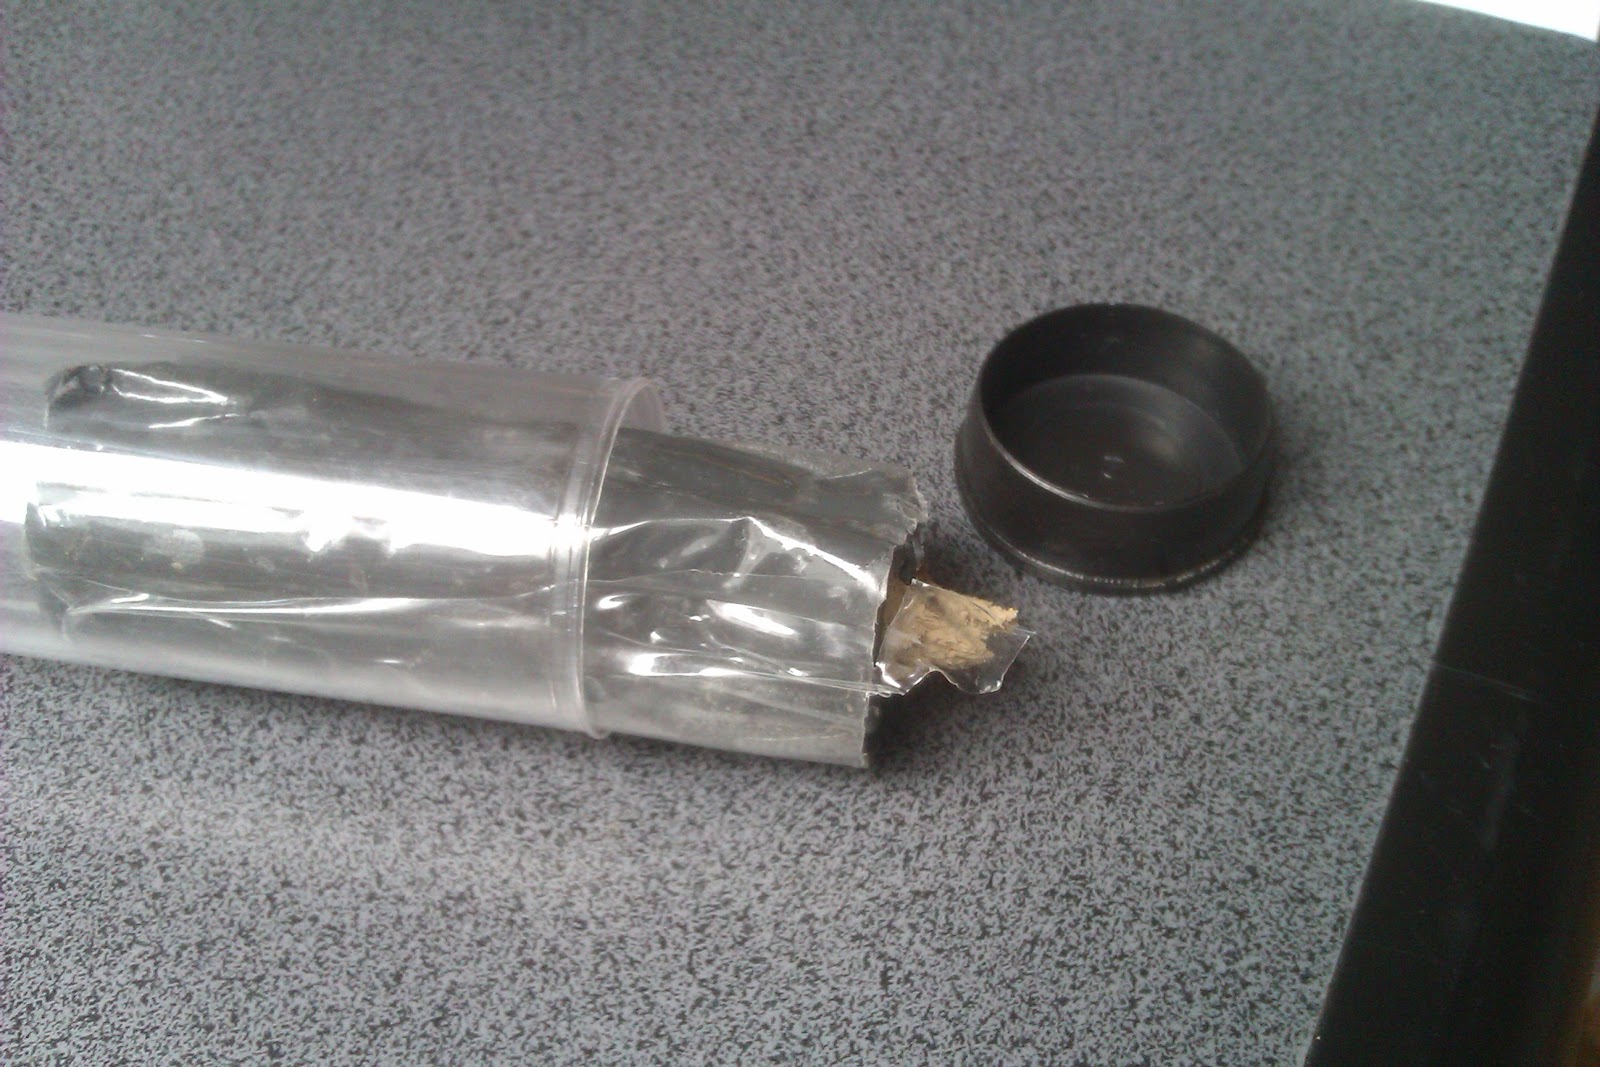
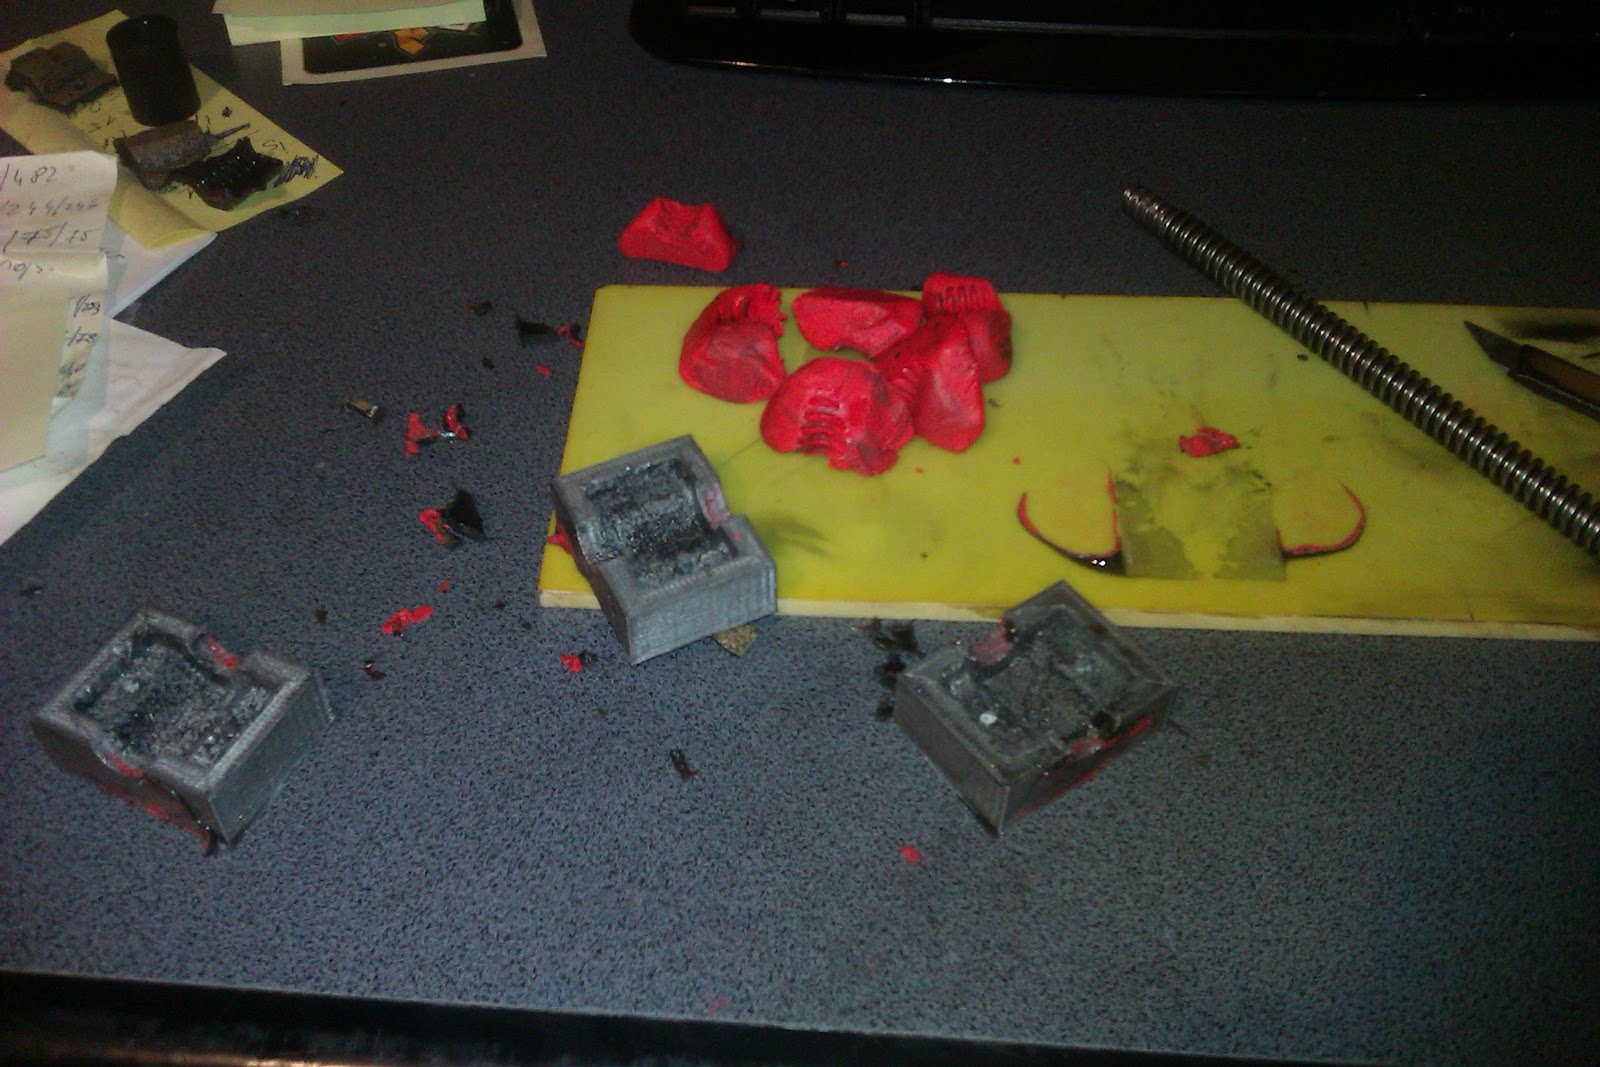
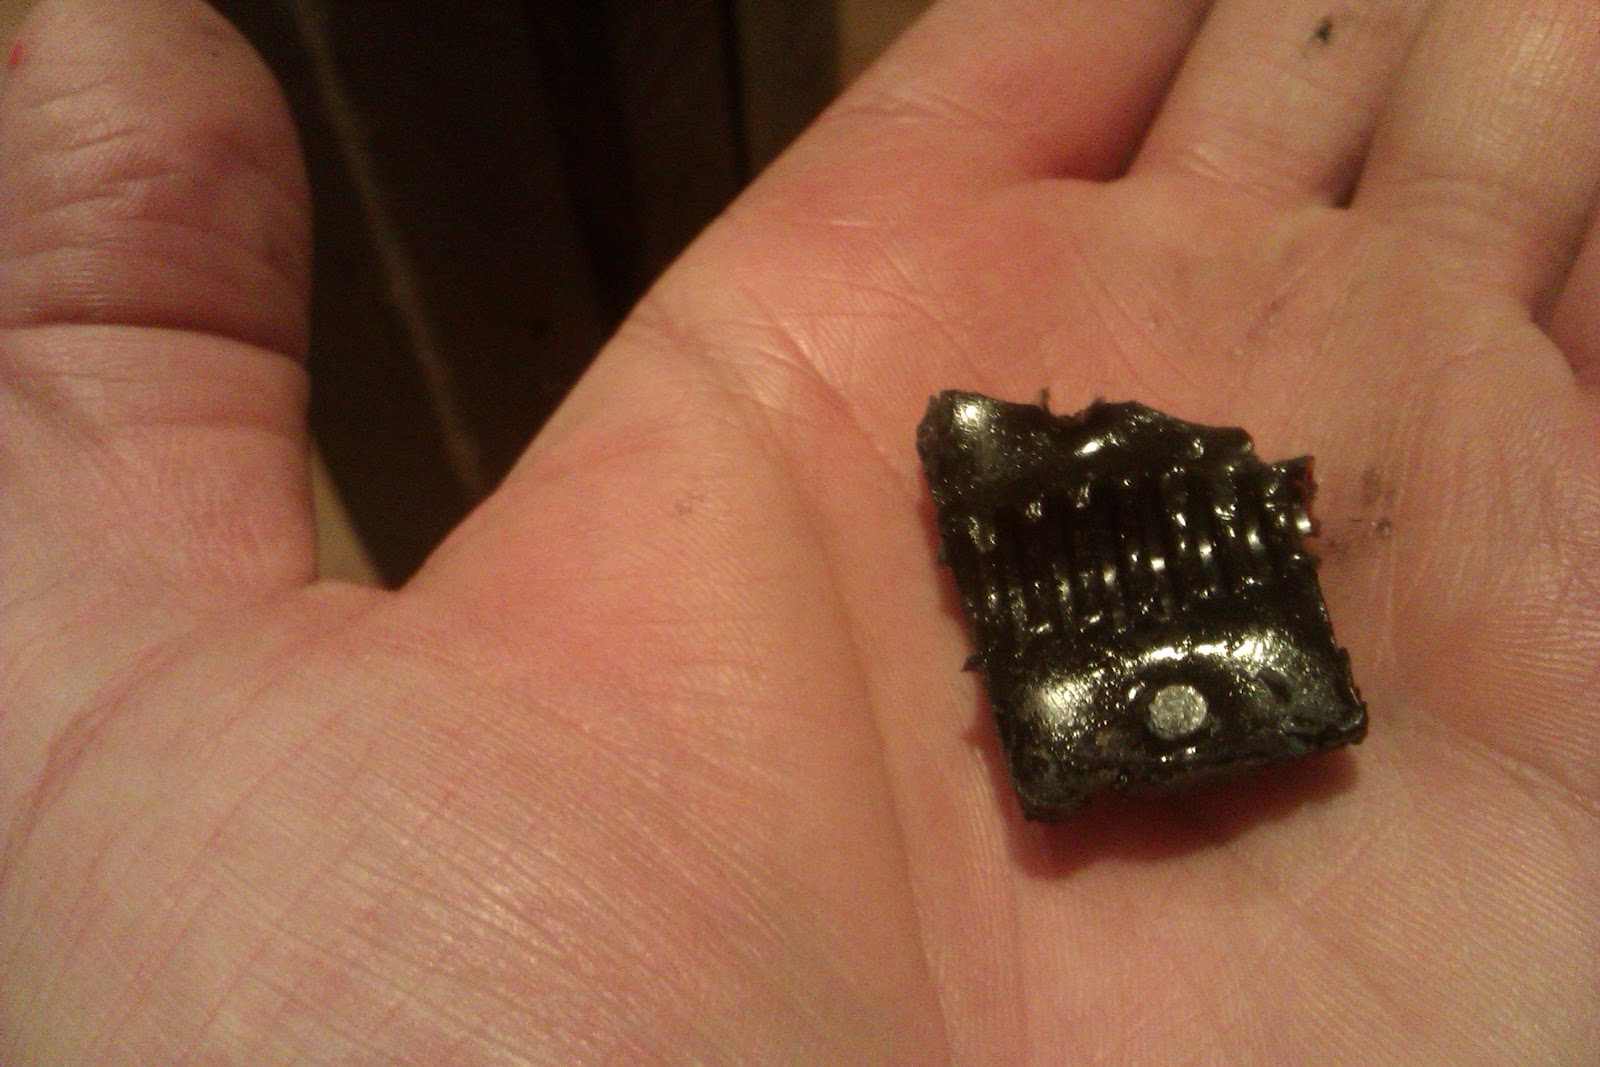
It's a two-part putty-like resin. Just cut as much as you need and knead untill the colour is uniform. Unfortunately, although this cured rock-hard, it was very brittle and couldn't even take it out of the mold without flaking it or breaking it into several pieces. This was the biggest of them:
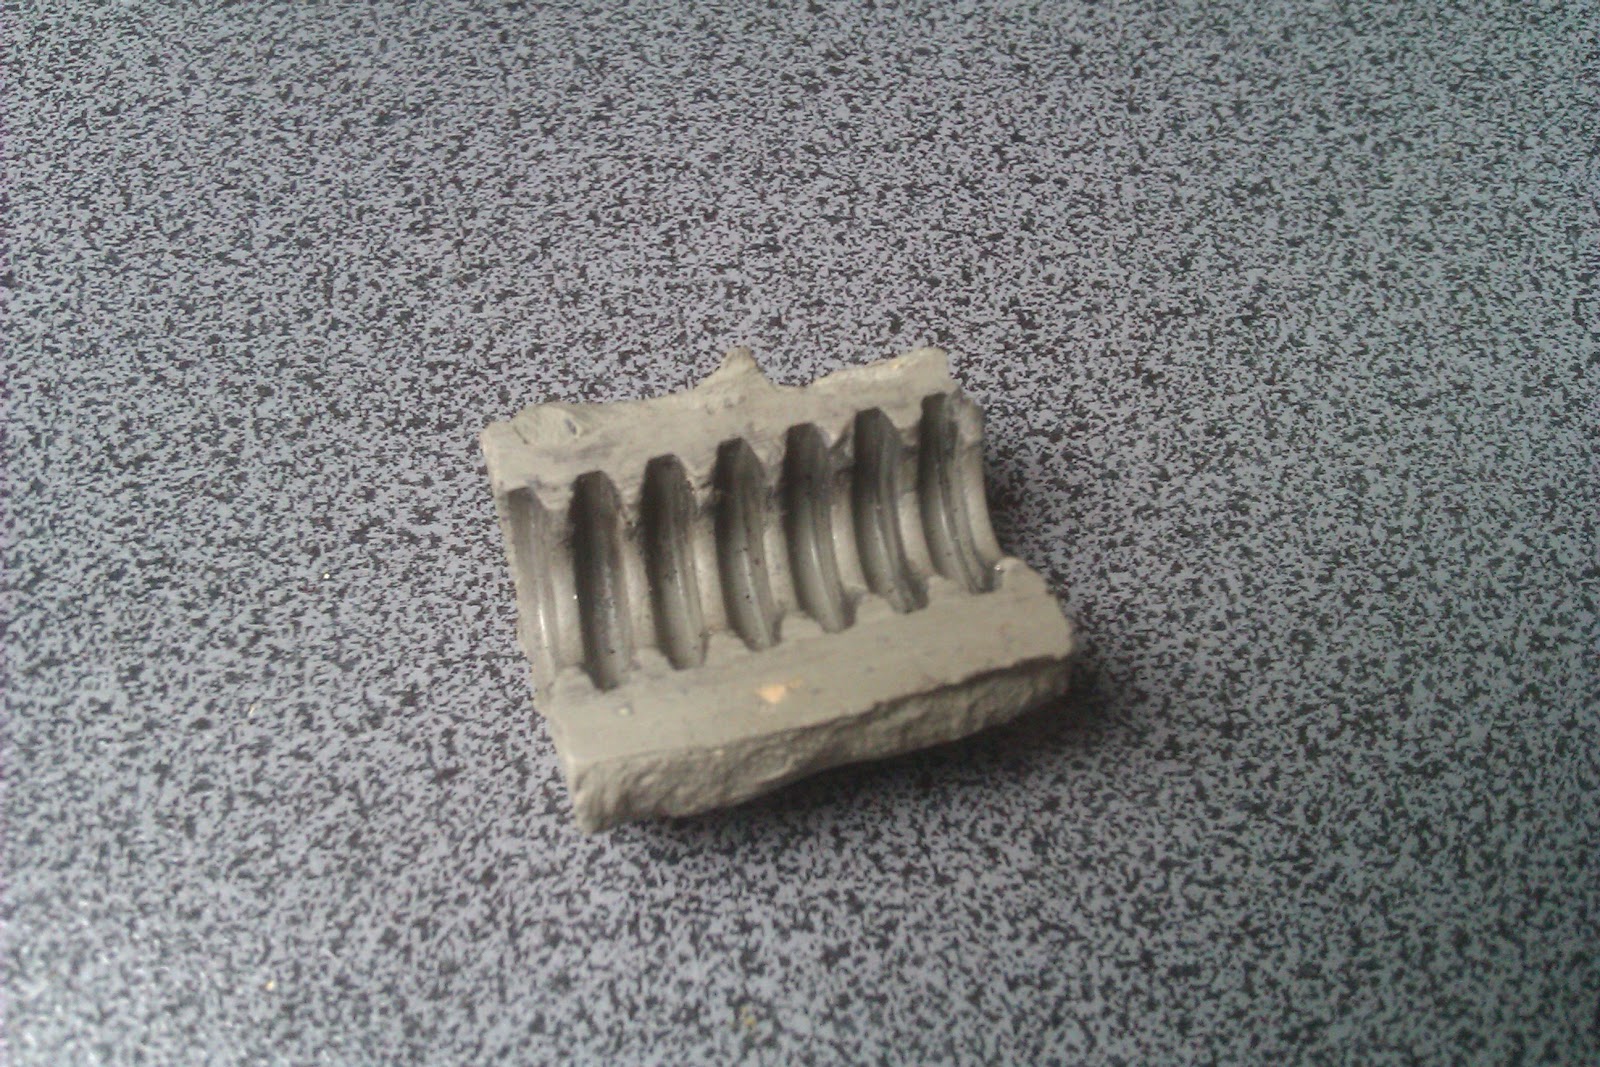
Though it came out the way it did, I still could run the half-nut on the screw...by just holding it with my hand. Unfortunately, after taking the nut from the bottom of the screw to the top, with only hand-pressure applied to the half-nut to engage the screw, I noticed that the ACME screw was stripping away material from the bearing surface of the half-nut. A lot of material. Needless to say, that's a big No-No.
So, I considered this alternative:

but after seeing how the cured resin was just a bit on the stretchy side, I refused to give it any further thought.
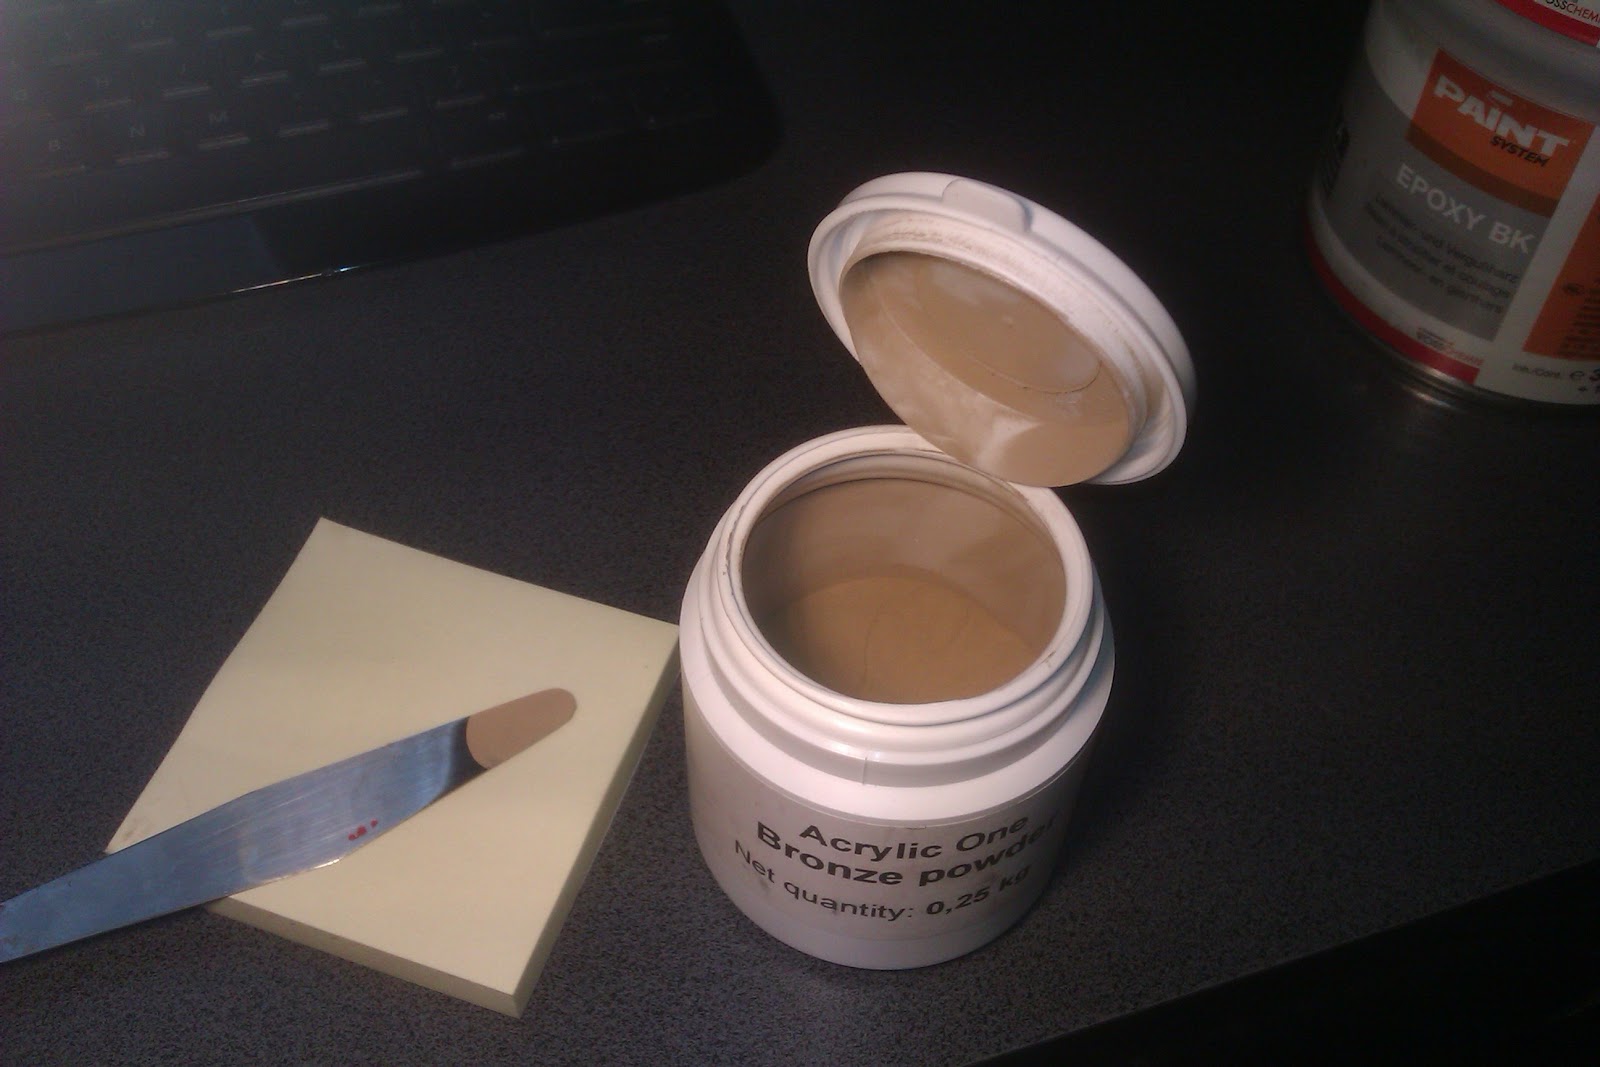
Finally, I bought some expensive cans of a two part resin and some bronze powder. 250 grams of the bronze powder were about 23 Euros and 500 grams of resin was aroud 30 Euros.

Now, just like in any cake recipe, it's essential to mix the right ammounts so that at the end, you aren't left crying over spilled....resin.
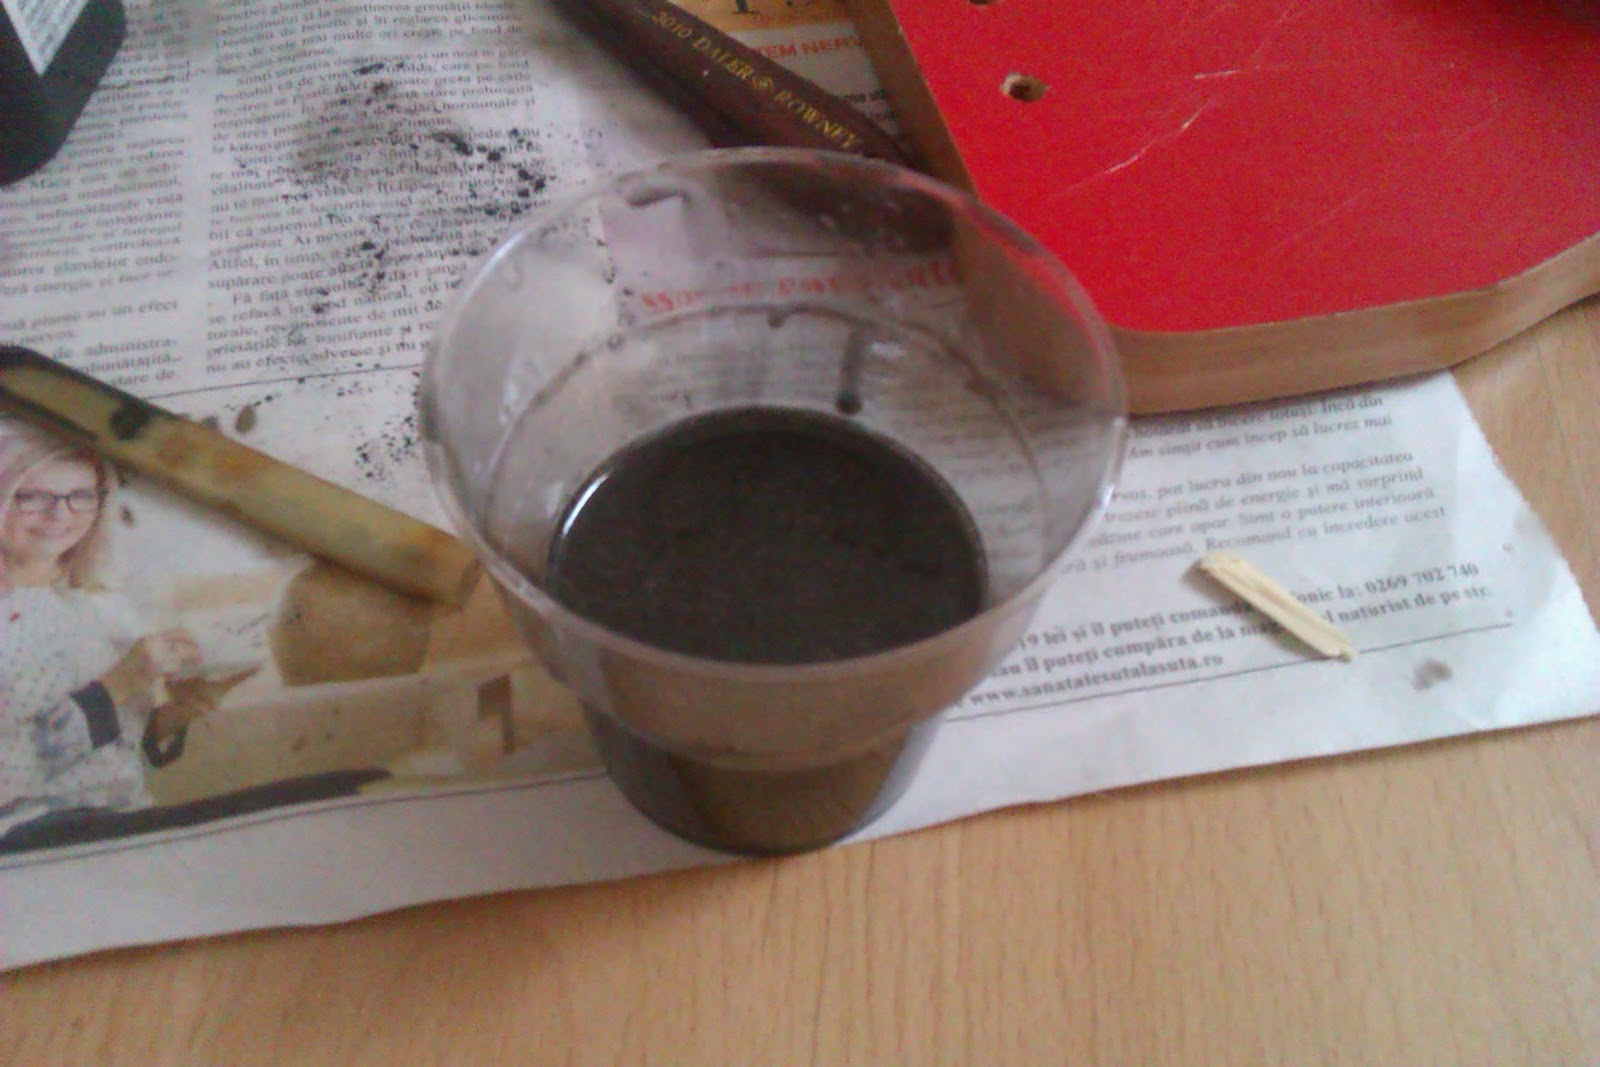
For the initial batch, I mixed 41 grams of A-part resin with 24 grams of B-part resin. I did this because first, the resin has a working time of up to 30 minutes and second, I read in a few places it's better to catalyze the resin first whenever you want to mix in metal powders.
Next, I mixed in about 7 grams of the bronze powder and about 1 gram of graphite powder.
Now, some of you keen-minded fellows may find that 41 g and 24 g means a whole lot of resin. And you'd be right of course. I mixed WAY more that I needed for 3 moulds. Something like 10 gr. of A resing and 6 gr. of B resin would have been sufficient. Oh wel... live and learn... and cry your heart out for all that wasted resin.


While the resin cured, I started putting together the rest of the frame.
Apparently, the people I ordered the linear rods from didn't have a bottoming tap, so though the hole was 20mm deep, the threaded part was only 5mm deep. So I had to cut and grind 12 M4x16 screws to about 7 or 8 mm in length. Not really pleasant, but in a pinch, it did the job. The alternative was to order some M4x8 screws, which didn't really make a lot of sense. Oh, and I just used a pair of pliers to get the screws lo length. Low-tech works every time.
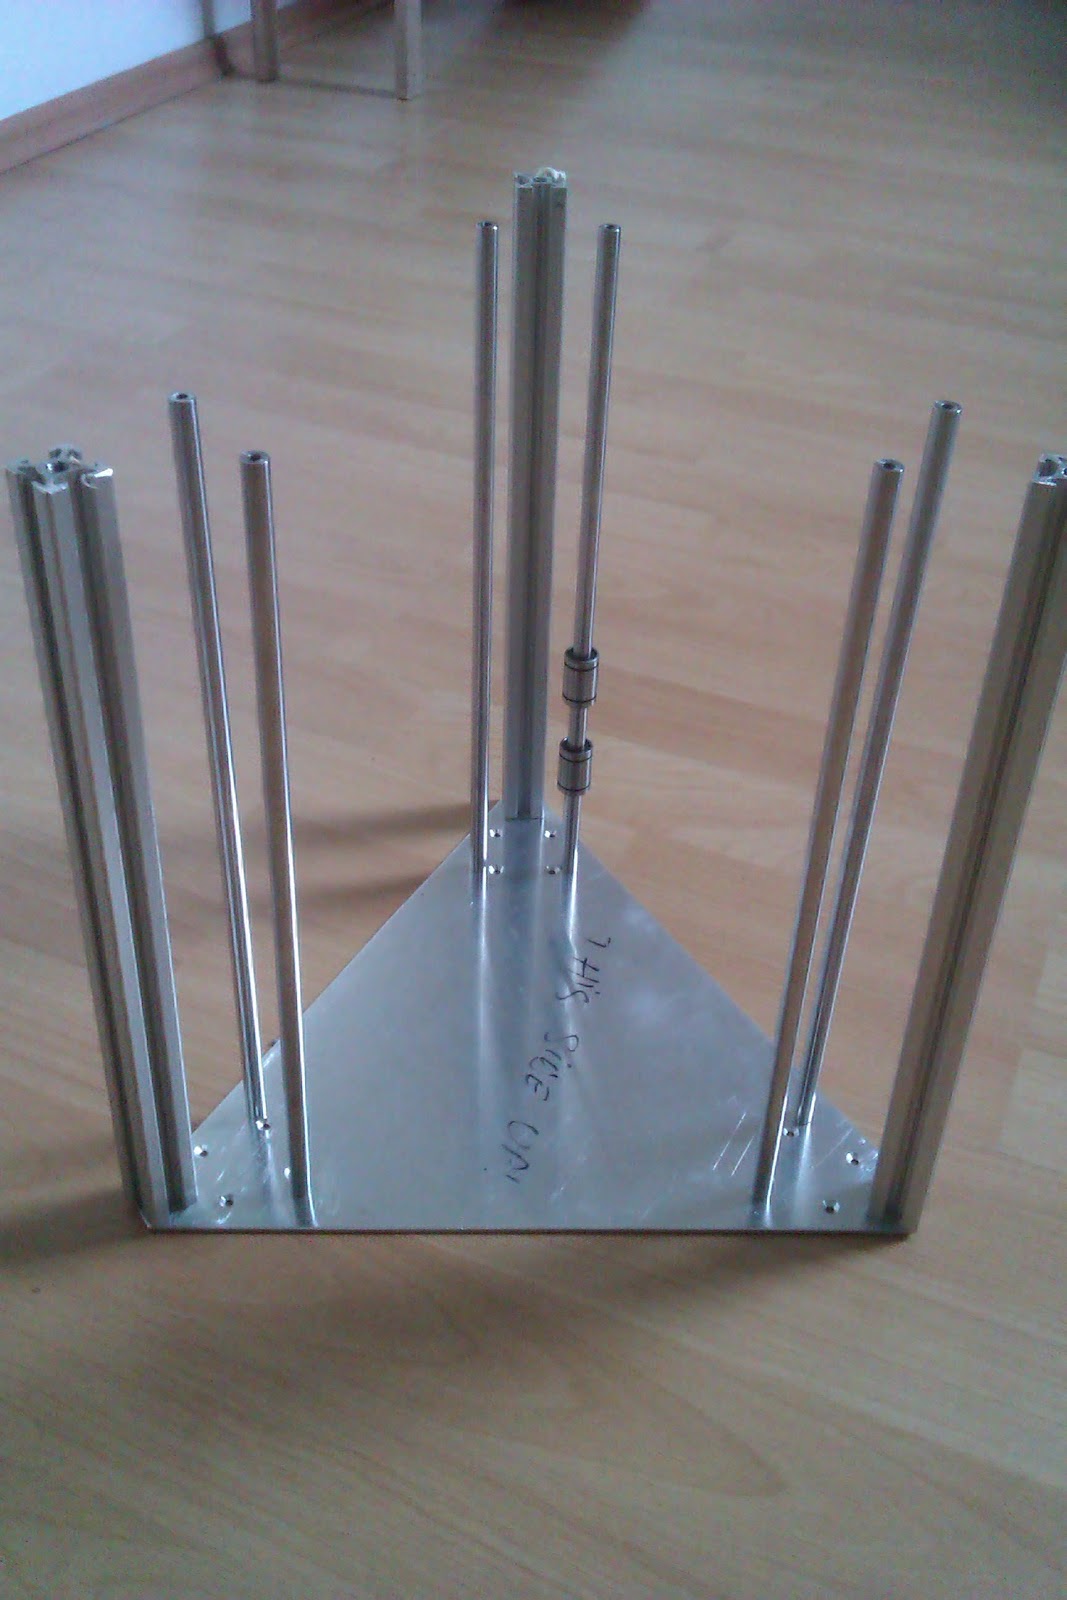
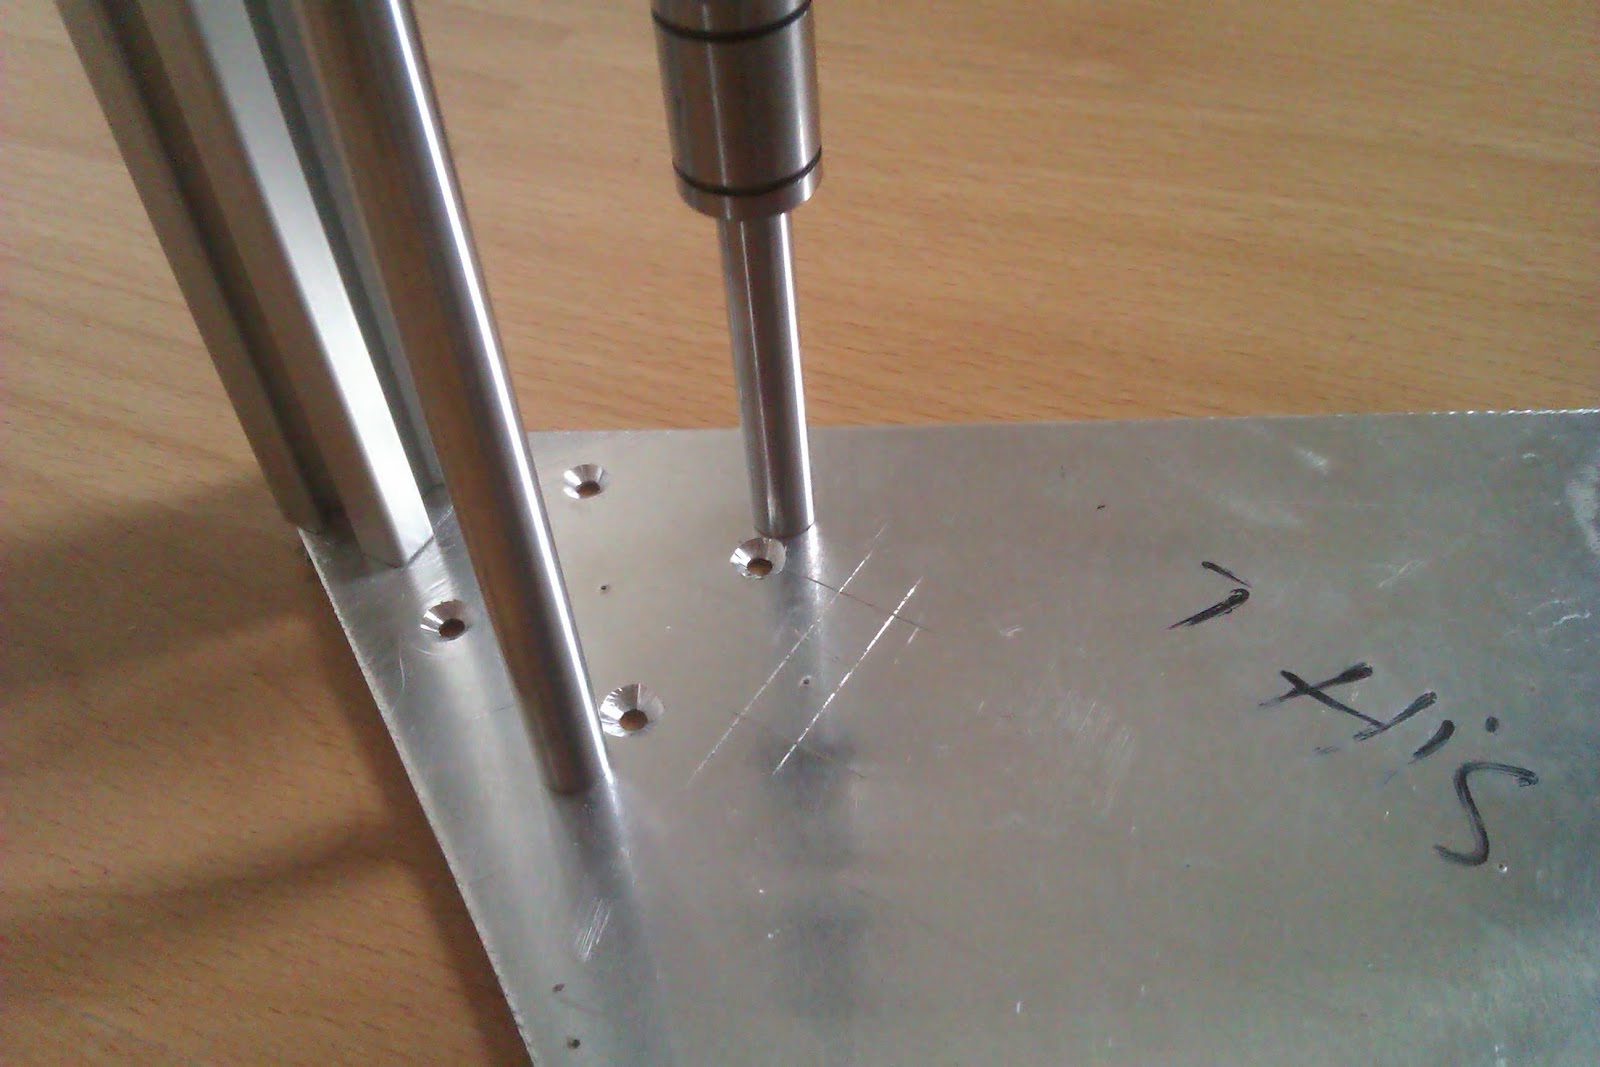
The aluminium plates were all drilled and chamfered and once everything was tightened, the frame was really stiff. Remember, I used 2mm aluminium plate instead of 3mm, so I had some initial worries regarding this.


I also bought some 6000ZZ bearings and fitted them to the lead screw supports. I kind of goofed up on the diameter of the hole for the bearing, but since I already had printed the three lead screw supports, I went DIY on it's ass and wrapped the outside of the bearings in some kapton tape. This made the bearings fit nice and snug. That's one way of solving it.

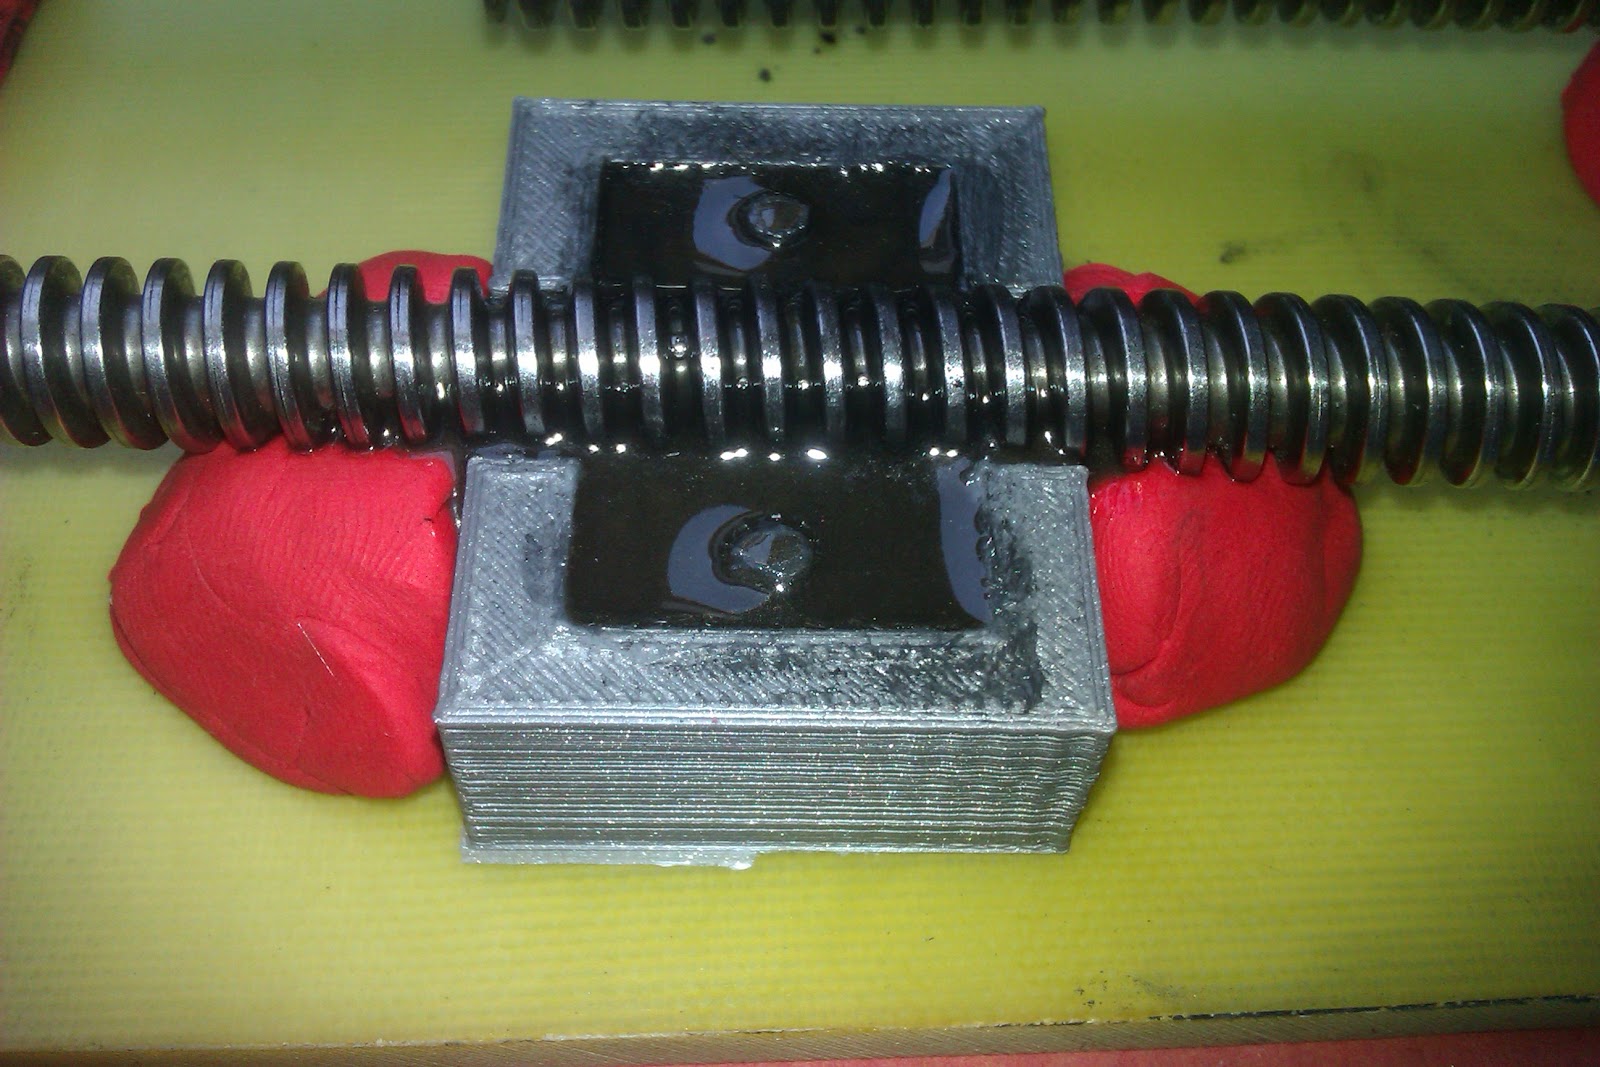
About 24 hours after the initial pour, I took out the resin castings from the mould, and the results were....less than impressive:


Because there were two stakes in the mould, for the mounting holes, the castings came out in pieces. But that was the least of my worries.... because the resin was really runny and thin, it allowed the bronze powder to sink to the bottom, instead of being uniformly dispersed into the resin, hence the gold colour on the back side of the castings. The graphite poder however seems to have been pretty well incorporated into the resin.
So, for the next try, I'm going to have to do some experimenting.... I'm thinking one way would be to use less resin and add so much bronze powder, so that the resin will only serve to bond the bronze particles together, resulting in a casting that is mostly bronze powder (80 % bronze maybe?).
Another option, just add something like 50 percent bronze powder to the resin mix and hope that wil thicken the resin enough to still be able to be poured but also not let the bronze settle to the bottom.
However, despite this drawback, I did manage to try out two half-nuts on an ACME screw, and the result was pretty amazing.... Absolutely no slop in the nut. And though there was no bronze on the bearing surface of the half-nut, it moved very smoothly on the screw and without any (noticeable) resin material being stripped away by the screw, like with the first resin experiment I did.
As a sidenote, a thing to consider when doing this is LUBRICATION of the moulds. Do not leave any part of the inside of the mould un-lubricated (is that a word?) It will be a nightmare to get the mould casting out.
I smuthered the inside of my moulds in silicon grease and also dabed graphite powder onto the grease. I it hadn;t been for the two mounting posts in the mould, I think the castings would have came out in one piece.
And if worse comes to pass, you can always print your moulds at about 10 Percent infill, allowing you to sacrifice the mould to take out the casting.


