I want a PCB and I want it NOW!
Have you ever had a burning need to design, layout then etch a 2 sided prototype PCB, at home, before you send it out to a PCB fab, to make sure everything is OK?
Well, so have I.
I came across a PCB "design bundle" that I really want to try out and build.
This will be the first in a line of blog entries, detailing my build process and review of this.
Because of it's open source nature (nice one guys, thanks!) I had everything I needed to modify and adapt my design to fit the parts that I had.
Therefore, along with these posts I will also upload the files for the parts that I redid, just in case someone happens to have some of the parts that I had.
...but first, some background on this
I've spent a few weeks looking around for ideas on how to PROPERLY make a device that moves on 2 or 3 axes and has a UV laser for a head. I wanted this to do a line-scan on a UV resin-coated PCB board, then etch it and have a prototype PCB done in a matter of 30-60 minutes.
I quickly came to the conclusion that a traditional gantry-style CNC machine wouldn't cut it, in terms of speed.
So, thinking about other stuff that has a scanning laser, I thought about how fast laser printers work. Then I began looking at trying to control a mirror array from an actual laser printer.
In theory, it wouldn't be hard at all. Just have a hexagonal mirror spin on a spindle, shine a UV laser on it then pulse the laser so it will scan the board one line at a time. But, as always, the devil is in the details.
Suppose you have a PCB that's 10cm x 10cm. The laser position is fixed. All you're doing is generating a scanning pattern with the hexagonal mirror. That means, that relative to the center point of the PCB, the laser beam will have to travel 5 cm in each direction (5 to the left and 5 to the right). This means that the beam length will be altered by ± 5 cm.
According to physics, if the length of the beam changes, that means that the focusing of the beam will change also.
What that means is, with a fixed focus, as would be the case in a scanning head, the beam will be focused in the middle of the board and it will be slightly out of focus on the edges of the board. If you have a laser beam that is not properly focused, it will leave behind an image that is blurry.
And if you're doing a board with, say, 0603 components on it, the pads will come out looking more like blobs of copper.
Of course, laser printers have the same issue. The way THEY solve this is they have an f-Theta lens in the beam path.
For those of us that don't have Stephen Hawking on speed-dial, an "f-Theta" lens will take the incoming FOCUSED beam of light and keep it focused, no matter the angle it's outputted at (or, put it another way, along the scanning path, the beam, it will be focused in any point)
Source: http://www.opli.net/opli_magazine/eo/2014/optotune-demonstrates-new-laser-processing-lens-aug-news/
...Houston, we have a Problem!
So, let's just Google "UV f-theta" lens and see what we'v....OH MY GOD!!! How much?? F*** it! I'm taking up ballet lessons.
So, after I drank a cup of water, took a few Xanax pills and did that "Wax on wax off" move, I decided that I had to go back to the initial gantry style of CNC machine.
Note: for those curious enough to ask, a laser printer uses a RED laser. The PLASTIC f-Theta lens in a laser printer is NOT suited at all for the UV laser. The plastic the lens is made of is not transparent to UV light.
...Long story short....
So, eventually, after searching the net for all kinds of ways to solve this, I found this site: http://www.diyouware.com/DiyoPCB-MKI and my jaw just dropped. Now, how about that... that was EXACTLY what I wanted to build.
But first thing's first: let me congratulate the guys (and gals?) over at Diyouware.com for their hard work. Hope to see you in a Kickstarter campaign soon enough.
And no, I'm not in any way affiliated with them nor am I getting any money from them for writing this.
So, with the disclaimers out of the way, on with the story...
I began reading what these fellows did and how they hacked the Blu-ray laser head of the Toshiba drive. Of course, I contacted d the guys, and they recommended me the TwinTeeth variant of the PCB factory. The reason was that the original Mk1 design was kind of clunky and plagued with problems generated by vibrations.
Let's get building
Now, I have to say, I really appreciate what these guys have done. They did everything from scratch, even developing their own hardware and software platform.
And they've open sourced everything as well. To me, this is awesome, as everyone can get the files and make their own build, modifying it where possible and putting their own spin on things. So guys, a big thumbs up from me!
I've decided on building the TwinTeeth Plus version, as this has less 3D printed parts and to me, looks to be more stable mechanical wise.
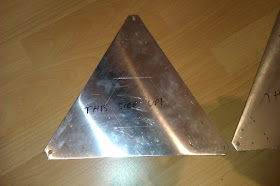
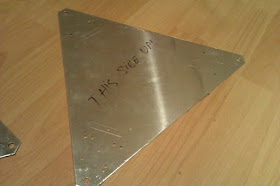
On these, I glued (OK, scotch taped) the paper templates then marked where the holes would go.
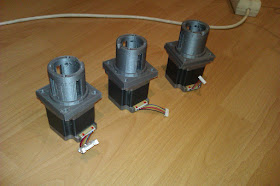
After this, I went to print the 3 motor holders that the delta sits on. And here is where the real fun begins...
Looking through my collection of stepper motors, I happened to find 3 identical NEMA23 steppers.
Next up were the bottom lead screw supports. Some F6900ZZ flanged bearings were supposed to be fitted into them.
Because these bearings seemed to proliferate in the wild planes of eBay, but nowhere near my country and because I got burned by the national postal service (which sucks) too many times,I decided I would replace the flanged bearings for "normal" ones. (flanged bearing was d=10 mm, D=22 mm, 6 mm width; replacement bearing is d=10 mm, D=26 mm, 8 mm width)
Unfortunately, the original dimensions in the .STL files have some wacky values, which proved to be a real pain to replicate. I had to build my own geometry on top of the .STL par to get the dimensions I needed. Then replicated and adapted that so a 6000ZZ series bearing would fit.
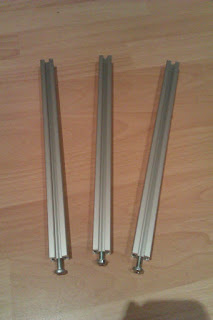
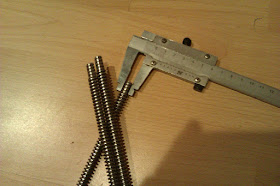
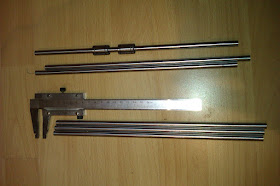
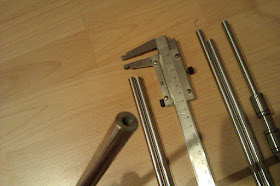
Next, I got hold of some 20mm x 20mm square aluminium profile for the legs, 3x10mm, 200mm long ACME (AKA trapezoidal) screws which I ordered to be milled on one end to 8mm, so it would fit in a 6.35mm x 8mm flexible coupling and 6 x 6mm, 300mm long guide rails, which I ordered to have M4 bolt holes drilled and tapped into them, at each end.
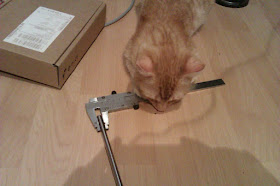
I also got some extra help for this build
He knows the vernier scale can be tough to read sometimes, so any help is welcomed.
Also, I know, the picture quality is really crappy.... I gotta get me one of those newfangled things called a camera. Tin-type photos, anyone?
Inches, millimeters, mills, centimeters....
The only thing I found difficult about this project so far is modifying the existing parts. It's not that they're in .STL format.... it's the fact that the dimensions are kind of all over the shop.
At least, this is what I gather from measuring the provided .DWG files and the original .STL models. I mean, there are hardly any measurements that seem to have nice round values. I don't know if this is due to the fact that the design was done in inches, then converted to mm, or something else is going on, but it makes things kind of hard when it comes to taking measurements.
...come one, come all....
This is the link to the GitHub page that contains the modified files. Like I said, I used NEMA23 steppers and 6000ZZ bearings and some of the 3D prints were modified for MY specific build.
As the build will continue, I will modify other parts as well. Why? Because it's interesting and because I have an OCD about improving stuff.
Next will probably be the ACME nut for the 10 mm screws. I don't know if a bough ACME nut will have more or less backlash than the original TwinTeeth method, where a mold of the screw was made and used as a nut, but those linear bearings held to the mount with zip-ties...kinda make my skin crawl.
Next will probably be the ACME nut for the 10 mm screws. I don't know if a bough ACME nut will have more or less backlash than the original TwinTeeth method, where a mold of the screw was made and used as a nut, but those linear bearings held to the mount with zip-ties...kinda make my skin crawl.






0 comments:
Post a Comment