Wednesday, October 17, 2018

Edwards E2M12 Vacuum Pump Teardown and Overhaul

   High vacuum is one of those things that really suck.... Sorry, couldn'd help it. 
  Parts are expensive, finnicky and not always readily available to anyone.


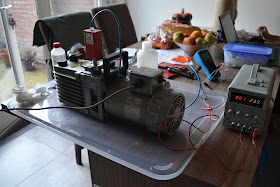
    I recently bought an Edwards E2M12 vacuum pump for a project of mine. When I got it, it came without any oil and without any idea of the state it was in. But for the money I paid, I couldn't just pass it.


   So, I now have a vacuum pump... what now?


Well, to be able to make it suck in the proper way, I needed to give it an overhaul So first thing's first.. get an overhaul kit. How hard can it be?

  Well, very hard, apparently, unless you're a company. Very limited opportunities for those of us not blessed with a VAT number.
Most of the suppliers out there, including Edwards themselves only sell to companies and the only source for the kit I found, charged a hell of a premium for it and asked a metric ton of money for shipping something that weighs in a couple of hundred grams.


As reference, here's a list of stores that have Edwards supplies and kits, together with my rants comments


  • www.vacuumpumpsupply.com This is where I bought my kit from. A bit over-priced, but hey....at least they sold me one They do deal with individuals, not just companies, so that's perfect. However the shipping was very expensive even from the USA to Europe. Also, 0 points for customer support. I litterally tried calling them tens of times but nobody answered. Also all my emails sent to them requesting some info about the order went unanswered. But hey, they don't need to answer any phones or mails when they get a wad of money from their customers

  • www.idealvac.com Yep, they also have kits and yes, they do do business with individuals, but they're even more expensive than the previous guys.And shitty shipping policy. If you're from the US, they're...ideal. If not, tough cookies then.

  • https://shop.precisionplus.com  European store from what I can figure. Pretty low prices, but they only deal with companies. Only found out after about a week of trying to get someone there to look into why my account was not active. Though if you can borrow a friend's VAT number, they have the lowest prices as far as I've seen.

  • https://www.jrtech.fr/en/  A lot of supplies  here. Regarding my kit, they only had it from some off-brand company. Not original from Edwards. Could be helpful in a pinch, though.


    Was wondering what happened to all 4 of my mails and the 10+ phone calls or so. But the EM12 kit is finally here. Now what?


  Well, easy if you know you way around one of these things. Not so much if you're a noob like me. So, we seek the help of the collective hive mind.


   This helped me out a great deal. Nice write-up, and a lot of other useful links and info in the posts. Seeing how many models of these vacuum pump are out there, I thought I'd post my own adventure together with some helpful pics. Be sure to have a look through all the posts on the  EEVBlog link before you start working on your pump.


    First thing's first: flush out the pump. That is, drain whatever  oil there is in the pump then fill it with some cleaning fluids. Paint thinner is recommended in the link above, but I couldn't find anything useful, so I used some denatured alcohol. It doesn't do a great deal to dissolve the oil but it does flush out any dirt and in my case, spider webs and is safe on the seals. Of course, the E2M12 is well made and no ball bearings inside to screw up with aggressive solvents. But I went the safer route.


   Yep, guessed it... the blue stuff... denatured alcohol. Even after this step, there will still be oil left if you plan on tearing down both stages of the pump So have a lot of rags on hand or have a big sheet of plastic on your work table / space. I had a big plastic tupperware lid on the table, so it'd catch any oil spills.


Next step would be to get some service manuals for the pump. You can also find those in the previous link. As a side note, the M2, M5, M8 and M12 are functionally the same.


    If you plan on taking this thing apart, make things easy. Separate the motor from the pump first. This will make everything much easier when handling.  Start with the two red plastic parts either side of the pump.

On mine, the coupling to the motor  has two keys on either end of it and two grub screws (#1 and #2 in the pic below) Undo both of these and then the four  Allen bolts holding the motor to the pump's frame.


    Then you can just pull the motor away from the pump. 2 people are ideal for this task, but being the proud engineer that I am, and also being alone in the house, I did it by myself. 

My pump didn't come with a plate underneath. If yours has this, also undo the bolts holding the motor to it.


    Putting aside the motor and focusing on the pump itself, undo the four allen bolts holding the pump cover....after you've drained everything from the pump, that is.


You can use a plastic or wood shim to pry the two halves apart.


   Now that you're in like Flynn,  how about you take off that thin steel plate held with those two allen screws.


    And, while you're at it, undo the other two and the small aluminiun block holding that copper pipe (gas ballast tube) in place. Slide the cast rear cover plate down about 1 or 2 cm and slowly but firmly pull on the pipe. It comes out easily, just be sure not to bend it too much. 


Once the plate is off, you have access to one of the pump's stages.


    If you want to go ahead and take out the vanes, a word of caution. They're made out of some kind of phenolic resin so do not grab then in any way. Handle them like you would one of your french girlfriends.  
   I, on the other hand, took a dental pick and pried them out by hooking onto the spring inbetween the vanes. Another way to do it is also mentioned in that link from EEVBlog... take out the screws holding the pump stage (LV stator) to the rest of the body and slide it out a bit. 1 cm should do it, then push it back in. This should expose the vanes just enough so you can get them out.


Sources mention there is also a bolt in the middle of the now exposed shaft. Mine didn't have something like that. Seems they modified the design through the years.

 So all I had to do to get to the next stage was to only undo the allen bolts of the LV stator. The alignment to the main body is ensured by two precision ground  pins. Easy, right?
Well, it depends. This is the actual tricky part of the whole thing. The mating surfaces of the two parts are machined and can actually stick together.


    There's two recesses in the pump body, one on each side (marked with yellow). You can use those to prie open the parts. Just don't do it with metal tools; use plastic, wood or like I did, aliminium. Even with the aluminium I was extra careful not to scratch the inner surface of the parts. And used them only up untill the point the plates were separated enough to allow some plastic shims in between them.

    Also, the guide pins (marked in...yellow?...lime green?) will ensure the plate jams if you do not pull it out  straight


    These are some of the tools I used  in taking apart the plates. And yes, that's a PCB you see there. I filed down one corner thin enough to get in inbetween the plates and spread them apart. The orange shims were also used fot this task to take over where the PCB left off.


    At this stage, my pump looked pretty clean, so I didn't go any further. I just replaced the seals and started to put everything back together again.


    Also note that there's a lot of service manuals from Edwards from different years and the actual numbering on the schematics is not the same, only the names of the items. So be careful if someone refers to parts from schematic numbering instead if actual part numbers.


A few O-rings and some tightened screws later, everything was back together again.


  Oh, yeh.. you might have noticed the Edwards Pirani gauge on the pump. A little something I picked up on eBay. Works too... imagine that. It's an APG-M gauge and like the pump, it has its own story. But I'll tell that somewhere more private. Like in a next post.


    All's well when it ends well....ish..

 I measured the vacuum level after I put the pump together and the fact that it make any is a real surprise to me. Looks like I'm not all thumbs. But it barely makes 1 x 10e-2 mbar, which is OK for now, but way under the expected performance of this pump.
I think I narrowed it down to some leaks in the gas ballast circuit... probably didnt istall that allast gas pipe correctly. I'll get some vacuum grease and put a dab on the orings and will post some updates. 

As always, this is the whole album of the teardown. Enjoy


Friday, July 13, 2018

Making drafting pens great again. Rotring Rapidograph refurbishing


     Great title, huh?


  Ok, so in a previous post I showed off my drafting pencil collection and wrote some personal notes of what I think about the Rotrings, Pentel and Kuru Toga.

   Now it's time to show you another, more dark part of the story...one involving black drafting ink (Pulitzer nomination for this posting, I guarantee it)


  I mentioned in a post a while back, that I found some Rotring Rapidograph ISO pens at a flea market. So I bought them, took them home, 'cause where else might I take them, then researched on how best to clean them and get them working again. Well, almost every article out there says you should soak them in some water for a day or two. So I did.


    From the black stuff floating aroung, you can guess these pens were ridden hard and put away wet. As you might imagine, this isn't really the way to handle these,  so after pulling on the pens so hard that I thought I'd break the plastic threads on them, I got the tips out and soaked them for 5 days in plain water. And same for the used ink wells. I'm stingy like that.


  After repeated soakings, then tapping the botton on the table (really hard) to get all the crud out, then more soaking , I reached a point where I thought they were clean. But I was wrong....


   So this is what a tip looks like. This is a 0.5mm one. And a dirty one at that. The brown part is the actual tip that goes in the pen and the ink covered thing with the needle on the left is the plunger that goes inside the tip. And as you might have guessed, all that dried ink shouldn't really be there. So I continued with more soaking and  then cleaning the plunger with paper towels. The tip also went for another soaking.

I even tried to put them in some IPA for a few hours (I'm refering here to isopropanol alcohol, not beer)


Better, but still not there. The more I soaked them, the more dried ink came out in small little bits.


   So the only thing I could do was just to keep at it until everything was shiny and clean. This tooks in total 7 days. 5 days of soaking and a whole weekend for the cleaning and putting everything back together.


After I gor everything squeaqy clean, assembling them was really easy. Add some ink cartridged from Rotring and job done


  Now, there might be other like-minded people out there, so what follows is a step-by-step on how to take apart a Rotring for cleaning. Yeah, there's Youtube.... but unfortunately I never really saw someone actually take out the plunger from the tip. Hell, I didn't even know it was there. Imagine my surprise when it first came out of the tip. 

   Oh, and most of the videos show you the pens being rinsed with some water....then lighly dried with a towel. Well, ink that's beed dried for some years isn't really going to dissolve in water. Trust me on this one. The only good way is to wack it out of there.


   First unscrew the pen and the well from the outer casing (the red thing that says Rotring on it)


 Then unscrew the coller so that you're only left with the tip and the ink well


   Now, to pull out the tip, screw it in the back of the casing, then pull on the ink well. Note, that if your pens were like mine and had the ink  dried on it for some years, it'll take a lot of force to pull off the ink well. And by a lot I mean you'll get that "this thing is going to just break in my hands" feeling. 

   But don't worry.... if you pull on it a bit at a time, it'll come loose eventually. As an alternative, you can pull off the ink well just a bit,  then soak the whole tip in some water for a few hours then try again. 


 Nearly there. There's one more thing to take care of. See that little black thing on the end of the tip? That has to also come off so that you can take out the plunger inside. Of course, if you have the ink caked in there, you'll need a lot of soaking and percussive maintenance until you can get that out.


And I leave the rest in your capable hands. After everything is as clean as your OCD will allow it, just put everything back together again. Oh, and don't forget to let the tip and plunger thoroughly dry.


And as a final word, make absolutely sure that every bit of dried ink is gone. If not, it'll just clog up the tip again. Though if that happens, you can use the plunger and ram it from the front of the tip to get  things flowing again.

   See you guys next time. Well, not see you...but... well, you know what I mean.


Thursday, July 5, 2018

Pencil Review: Rotring 800, Rotring 600, Pentel GrapghGear 1000, Uni Kuru Toga Roulette


      Yeah, I know. Weird, right? I know it’s not what you’d expect, but hey… I felt inspired.

    For those that don’t know me,   I have a bit of a pencil fetish, and also I haven’t seen a review of these from an engineer, so I figured I might just as well. And just as a mention, no, I don’t use the pencils for “art” purposes. I can’t draw a picture to save my life, but what I do draw with the pencils are mainly schematics, make some annotations or draw up mechanical stuff.

    But, before I start, I’ll make the disclaimer that these pens were bought with my own money. I’m not affiliated with any company selling these pencils. It’s just me, trying to put down my thoughts, likes and dislikes about these four models that I have.
And now, let’s get down to it.


    The pencils (from left to right) are:the Uni Kuru Toga Roulette (also 0.5mm), the well-known Rotring 800 (0.5mm lead), the Rotring 600 (0.7mm) Black, though I'd normally expect it to be longer than any other pen... cough cough...  and the Pentel Graphgear 1000 (0.9mm).

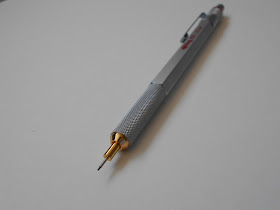
    First off is the Rotrings. Now I should just start by saying that both pencils are my favorite. The design is  simple and elegant but has a very technical aspect to it. The whole body is made from nickel plated brass so they have quite some heft to'em.
And you can feel this when you pick one up. For some people this might be a turn-off, but personally, this is one of the reasons I like it. 


Despite the weight, they're well balanced and don't feel tip-heavy. The 800 model features a retractable tip so you take it with you to  work…to show it off to your fellow engineers and make then jealous.
Aesthetics-wise, the contrast between the bare brass accents and the  dull nickel finish on the 800 is very nice and, considering the money you pay for it (65 Euros), the guys at Rotring really paid attention to the details. When you retract the tip, you can actually leave the  lead sticking out a bit and it still won’t protrude out, something  that Pentel didn’t really get right.

The 600 one is also very pleasant looking, sporting a lead indicator and a black satin finish. This feels more rugged and bumpier and also makes it a pain to take proper photos of it.


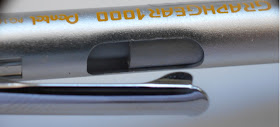
    When you look at the Pentel, you’re met by a generous grip with rubber inserts and an overall nice looking design. Then as you go up, to the clip  …… NO!... Just No!  


     There’s a gaping hole right under it, like someone  had his way with a dremel tool. And that exposed plastic mechanism inside…..
 Ok, I’d have no problem with this, it still looks kind of nice, but considering the ~20 Euro price on it, I’d have expected a different kind of locking mechanism that doesn’t let you peek under its skirt.


     It  is heavier towards the tip, which depending on your preference, it may not be a good thing (I like it though)
    Fancy-pantsy stuff aside, the pen itself is really sturdy and nicely built The body is all metal and just like the Rotring, it looks like it can survive a small nuclear blast. The model I have takes 0.9 or 1mm lead, but regardless of the size, the problem is the same….  you have the lead sticking out and you retract the Pentel’s tip… but there’s still going to be some lead poking out. Which, let’s face, it’s not the end of the world, unless your OCD kicks in. And then you have to pull out the  tip again, depress the lead release thingy, push the lead back in, then retract the tip again....sigh...

  And speaking of OCD, whenever I’m using it, if I rotate the pencil too much in my hand, the big metal clip hits on my thumb and becomes somewhat of a nuisance. Therefore, I can’t really rotate the pencil as much, so the lead gets lob-sided really  fast.
  But still, between these and  the knurled  grip and the lead hardness indicator, it remains a fine instrument which I love to use, despite the shortcomings (most of which are psychological).

   The Uni pencil is the latest in my collection and also the cheapest… something like 17 euros including shipping. And unlike the Rotring and Pentel, it came with extra  lead and erasers So thumbs up for Uni.


    Design-wise, the grip is metal with fine knurling on it, while the rest of the body is plastic, making for a nice overall look and feel. Personally, I’d have liked all of it to be metal, but you take what you can.
   The tip doesn’t retract like on the other two but that again, it’s already got a gimmick of its own: it rotates the lead  a bit, every time you touch the paper, ensuring the wear on the tip isn’t lob-sided
  And it actually works quite well. At least for doing schematics and drawing small and medium length lines.


  It takes a surprisingly light pressure to make the mechanism actuate and from the little use it’s  had, I think it’s a real nice piece of engineering. 
   I’m curious about is how sturdy and durable the mechanism is, but only time will answer that question. The tip doesn’t flop around because of this. It’s firm when in contact with the paper and I can’t feel the actual movement of the lead, which is what you’d expect

  Of course, no review would be complete without some true engineering work and some final opinions regarding the pens
     Now, something that pops up  almost always is tip movement. Most people say some pens  have a tip that does the conga, while others say theirs is stiff as a coffin nail. Truth is, I'm curious what that actually means, in engineering terms. How much is too much movement? 
  Also, when you have something that's 0.7mm in diameter and 20 or 30 mm long, that's surely going to flex, no matter what. And some retractable tip pencils tend to have a real issue with this.

  So, I got out my trusty gauge and set to find out.
  The set-up consists of this big hunk of square milled aluminium bracket to which I so professionally held down my pencils to measure the tip movement. Yeah, we don't need no stinkin'  granite plate and toolmaker's vise.


   I took some care to only  put slight pressure on the tip, so as to get the measurement only for the free movement and not put additional pressure that would actually bend the tip. I succeeded, somewhat, but for a manual set-up like this, you can't really expect too muhch out of it.

And now, the results  I got

  • The Rotring 600, without the old in-out tip, registered 0.05 to 0.07 mm of movement
  • The 800 on the other hand, with the retractable tip, got something like 0.08 to 0.1 mm
  • The Pentel, the most beefy of the bunch tip-wise, got a 0.05 to 0.08 mm. Honestly, I would've expected even less movement, though most of it.
  • As for the Uni Kuru Toga, the one that started this idea in the first place, the tip  moves something like 0.15mm. 
    Like I said the method I tried out isn't fool-proof so take these numbers with a grain of salt. Also this is side-to-side movement. So when you're putting pressure on the pen, the travel is basically halved. 

   And even though the Uni Kuru Toga has the largest movement, I can't say it is something that you feel when writing or drawing.


   Now for some fun facts that came out of using these pencils for a while.
  The Pentel, which is the less used of the lot, due to it being a 1mm lead, is OK, but kind of awkward to hold. Also, that big hole in it kind of putts me off sometimes.
The Rotrings are great for everything, from drafting to  writing and feel nice in the hand. The black version  of the 600 that I have has  some sharper knurlings and you can see that in most pictures online. 
   Probably due to the black coating or treatment it has. But still, it's on par with the 800.
 Between these two, the 600 has a very satisfying  "click" to it and the lead hardness indicator on it makes it stand out. That, and the black  paint job. The 800 's mechanishm isn't that "clicky" to be honest, but the fit and finish.. well that more than makes up for it.

    The Kuru Toga's hybrid style, part plastic and part metal gives it a nice look, but just knowing it's not completely metallic, kinda gets my nerd-juices in a tight spot. Still, I've used it and can say that as far as drafting goes, the roulette mechanism works, but for writing.. the pencil lead is gone in a flash. Full discolsure: I have bad handwriting and I mostly use cursive, so the mechanisn isn't really being put to good use here.

    The knurlings on it are awesome and give it a unique look  and for better or for worse, it's something I can tolerate having on my desk within arm's reach. Oh, and I think it's worth mentioning that the factory HB lead that comes with this one is a bit on the soft side, compared to regular HB from Rotring or Faber Castelle. 
And speaking of soft, the eraser is also like this.... so now I know why it came with so many spare erasers.  

      As a final word, there's also some Rotring Rapidographs ISO that I recently bought and reconditioned. so expect some nice pcs for thse in the future. Oh, and I also got an old drafting (draughting?) kit......aaand a Leroy lettering kit... some of you know where this is going...


google-site-verification: googlee8a41f51abde7545.html